بعد شهور من الإضراب والنجاحات التي حققها ماركوس وزملاؤه، بدا أن الأمور تعود إلى طبيعتها في مصنع "ستيلكورب". لكن ماركوس كان يعلم أن ما حدث لم يكن النهاية، بل البداية فقط. التحديات الجديدة بدأت بالظهور، وكان عليه أن يقرر كيف سيواصل النضال. مع عودة العمال إلى المصنع، لاحظ الجميع تغييرًا واضحًا في الأجواء. كان هناك شعور بالاحترام والاعتراف بالجهود التي بذلها الجميع. ولأول مرة منذ سنوات، بدأ العمال يشعرون أن أصواتهم تُسمع. قرر ماركوس أن يستغل هذا الزخم لإنشاء منظمة داخل المصنع تهدف إلى الدفاع عن حقوق العمال وضمان استمرار الإصلاحات. أطلق عليها اسم "رابطة العدالة العمالية". كانت مهمتها الأساسية هي مراقبة التزام الإدارة بالاتفاقيات الجديدة. اجتمع ماركوس مع قادة العمال وقال لهم: – "ما حققناه ليس إلا خطوة أولى. إذا لم نحافظ على هذا الإنجاز، فقد نفقد كل شيء. علينا أن نبقى يقظين ومنظمين." بدأت الرابطة بتنظيم ورش عمل لتعليم العمال حقوقهم وكيفية التعامل مع التحديات اليومية في مكان العمل. كما أقامت ندوات بالتعاون مع محامين ونشطاء حقوقيين. بعد إقالته من "ستيلكورب"، اختفى جاك هاربر عن الأنظار لفترة. عاش فترة عصيبة، مليئة بالشعور بالخزي والإحباط. لكنه في يوم ما قرر أن يغير مسار حياته. بدأ جاك بالعمل مع إحدى المنظمات التي تدافع عن حقوق العمال، محاولًا تصحيح أخطائه الماضية. كان يعلم أن ما فعله في "ستيلكورب" لن يُنسى بسهولة، لكنه أراد أن يُظهر أنه قادر على التغيير. في أحد الأيام، التقى جاك بماركوس في مؤتمر حقوق العمال. كانت لحظة مليئة بالمشاعر المتباينة. تقدم جاك لماركوس وقال: – "ماركوس، أنا مدين لك باعتذار. كنت مخطئًا في كل شيء." نظر إليه ماركوس لفترة ثم قال: – "الاعتذار خطوة جيدة، لكن الأهم هو أن تعمل على إصلاح ما يمكن إصلاحه." بعد سنوات من النضال، تقاعد ماركوس من العمل في المصنع. لكنه لم يتقاعد من النضال. أسس مؤسسة غير ربحية تهدف إلى تعزيز العدالة الاجتماعية ودعم العمال في مختلف الصناعات. أصبح ماركوس رمزًا في المجتمع المحلي، وبدأت قصته تُدرّس في المدارس والجامعات كنموذج للصمود والإصرار. كتب كتابًا بعنوان "قوة الوحدة"، حيث وثق فيه رحلته مع العمال والنضال الذي قاده. في يوم من الأيام، وأثناء توقيعه على نسخة من كتابه لإحدى الطالبات، سألته: – "سيد جونز، ما الذي يجعلك تستمر في القتال حتى الآن؟" ابتسم ماركوس وأجاب: – "لأن النضال من أجل العدالة لا ينتهي أبدًا. كل جيل يحتاج إلى أن يحمل الشعلة ويكمل المسيرة." في إحدى الليالي، جلس ماركوس في منزله، يتأمل صورًا قديمة من أيام الإضراب. كانت صور العمال، الهتافات، واللحظات التي شعر فيها بالخوف والأمل تختلط في ذاكرته. شعر بالرضا لأنه لم يستسلم أبدًا. تلقى مكالمة من أحد زملائه القدامى، أخبره بأن المصنع الآن يعمل بظروف أفضل، وأن العمال يشعرون بالامتنان لما فعله. بعد المكالمة، وقف ماركوس ونظر من نافذته إلى المدينة التي أحبها وقاتل من أجلها. همس لنفسه: – "لقد كان الأمر يستحق كل شيء." وهكذا انتهت رحلة ماركوس، لكنها تركت إرثًا لا يُنسى، ليكون درسًا للأجيال القادمة بأن القوة الحقيقية تكمن في الوحدة والإيمان بالحق. تمت.

Best Soil for Aloe Vera Plants: A Comprehensive Guide


Aloe Vera is one of the most popular houseplants, celebrated for its resilience, air-purifying qualities, and medicinal benefits. However, like any plant, it thrives when grown in the right conditions, especially with the appropriate soil. 


Aloe vera plant in a terracotta pot with a sandy, rocky soil mix, positioned outdoors to benefit from natural light.


Choosing the right soil ensures your Aloe Vera stays healthy, grows well, and avoids common issues like root rot. In this guide, we will delve into everything you need to know about the best soil for Aloe Vera plants, so you can provide optimal care for your beloved succulent.


1. Why Soil Matters for Aloe Vera Plants


Aloe Vera’s natural habitat is the arid, sandy regions of Africa. In these environments, the soil drains quickly and provides the roots with just the right amount of moisture. Mimicking these conditions at home is essential because:


Aloe vera plant in a terracotta pot with a sandy, rocky soil mix, positioned outdoors to benefit from natural light.

A-Poor soil leads to overwatering and root rot.


B-Well-draining soil prevents water from pooling around the roots.


C-Proper soil aerates the roots, ensuring healthy growth.


2. Key Characteristics of the Best Soil for Aloe Vera


For Aloe Vera to thrive, the soil should have the following properties:


Learn how to give your Aloe Vera plants the perfect soil for healthy growth and avoid common issues like root rot. Check out this comprehensive guide and video for expert tips on soil selection, DIY mixes, and care for thriving Aloe Vera plants—indoors and outdoors! Check this video.


Healthy aloe vera plants growing indoors in eco-friendly fabric pots, thriving in well-draining soil.

Well-draining: Prevents water from sitting in the pot.


Aerated: Allows oxygen to reach the roots.


Slightly acidic to neutral pH: Ideal range is 6.0 to 7.0.


Low organic matter: Avoid overly rich soils that retain too much moisture.


3. Can You Use Regular Potting Soil for Aloe Vera?


While regular potting soil is readily available, it’s not ideal for Aloe Vera. Here's why:


A-Regular potting soil retains too much water.


B-It lacks the sandy or gritty texture Aloe Vera prefers.


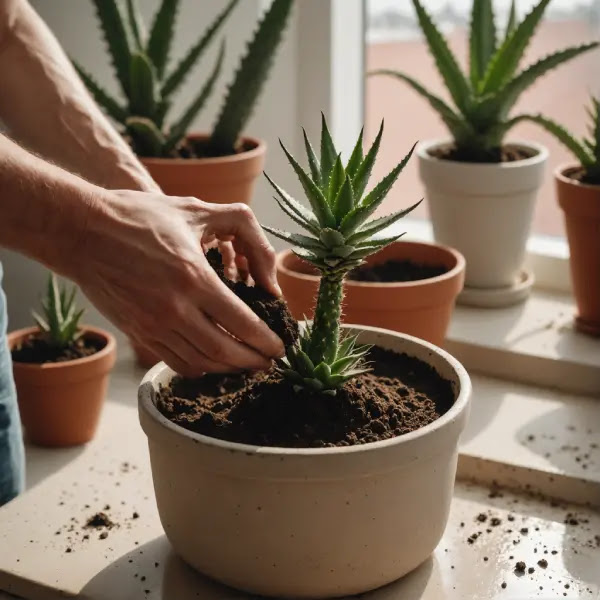
Gardener carefully planting a young aloe vera in a sandy, well-draining soil mix to promote healthy root development

Solution: Amend regular potting soil with sand, perlite, or pumice to improve drainage.


4. Recommended Soil Types for Aloe Vera Plants


The best soil types for Aloe Vera include:


Cactus and succulent soil mix: Specifically formulated for desert plants.


Sandy or gritty soil: Mimics natural habitats.


Organic soil with amendments: Use cautiously to avoid excessive moisture retention.


5. How to Make a DIY Soil Mix for Aloe Vera


Creating your own soil mix is cost-effective and ensures you’re providing the best conditions. Here’s a simple recipe:


Pouring water onto a potted aloe vera plant placed in a metal container, illustrating watering in well-drained soil.

Ingredients:


1 part sand or perlite


1 part potting soil


1 part compost or coconut coir (optional)


Steps:


A-Mix the ingredients thoroughly in a large container.


B-Test the drainage by watering a small amount.


C-Adjust the ratio if necessary for faster drainage.


6. Importance of Drainage in Aloe Vera Soil


Drainage is crucial to prevent root rot, one of the most common issues with Aloe Vera. Here’s how to ensure good drainage:


A-Use a pot with drainage holes.


B-Add a layer of gravel or small stones at the bottom of the pot.


C-Choose a soil mix that doesn’t compact over time.


7. Best Store-Bought Soil Options for Aloe Vera


If you prefer to buy soil, consider these options:


Miracle-Gro Cactus, Palm & Citrus Potting Mix: Affordable and widely available.


Hoffman Organic Cactus and Succulent Soil Mix: Great for organic gardening.


Superfly Bonsai Succulent & Cactus Soil Mix: A premium choice for Aloe Vera.


Indoor and outdoor Aloe Vera plants have slightly different needs:


Indoor plants: Use lighter soil mixes to reduce the risk of overwatering.


Outdoor plants: Choose coarser soils that can handle rain exposure.


Tip: Always monitor outdoor Aloe Vera plants during heavy rainfall.


9. Common Soil-Related Problems and How to Fix Them


Here are common issues and solutions:


Overwatering: Use sandy soil and water less frequently.


Compacted soil: Repot with a fresh mix to improve aeration.


Poor drainage: Add perlite or pumice to your soil mix.


10. How to Repot Aloe Vera Plants with the Right Soil


Repotting helps refresh the soil and prevent issues. Follow these steps:


1.Remove the plant gently from its current pot.


2.Shake off excess soil from the roots.


3.Fill a new pot with the right soil mix.


4.Place the Aloe Vera and cover the roots lightly.


5.Water sparingly to settle the soil.


11. FAQs About Aloe Vera Soil


Q: Can Aloe Vera grow without soil?

Yes, in hydroponic setups, but soil provides better nutrients.


Q: What is the best container for Aloe Vera?

Terracotta pots are ideal as they allow soil to dry out faster.


Q: How often should you change the soil?

Repot every 1-2 years or when the soil becomes compacted.


Conclusion

Providing Aloe Vera with the right soil is key to keeping it healthy and thriving. Whether you create your own soil mix or buy a commercial product, ensuring proper drainage, aeration, and pH balance will set your plant up for success. Experiment with these tips, and enjoy the beauty and benefits of your Aloe Vera plant. If you have any questions or soil tips of your own, feel free to share them in the comments!


 Rare Trailing Plants That Thrive in Apartments


There’s something magical about the way trailing plants cascade elegantly, transforming a bland corner into a lush, vibrant haven. For apartment dwellers, where space is often a luxury, these plants provide the perfect solution—bringing greenery without taking up valuable floor real estate.


Modern living space with a beige sofa, hanging trailing plant, and a potted plant on a side table by the window.


 Rare trailing plants add an extra layer of intrigue with their unique textures, colors, and growth patterns. In this post, we’ll explore some rare trailing plants that thrive in apartments and dive into tips and tricks to make them flourish in your urban oasis.


 String of Pearls (Senecio rowleyanus)


Bright and airy living room with a gray sofa, hanging macramé planter, and lush greenery near tall windows.


This iconic succulent is a showstopper with its bead-like leaves that drape beautifully. Its unusual appearance and low-maintenance needs make it a popular choice for apartments. Provide bright, indirect sunlight, and let the soil dry out completely between waterings. Use a well-draining potting mix for succulents to ensure the roots stay healthy.


Hoya Linearis


Cozy bedroom with a wooden bed frame, white bedding, hanging trailing plant, and potted greenery on the nightstand.


This rare hoya variety features soft, slender leaves that form graceful vines. Its understated elegance fits beautifully into minimalist interiors. Thriving in bright, indirect light, it requires soil that is lightly moist and occasional misting to mimic its tropical origins.


Dischidia Ovata (Watermelon Vine)


Known for its unique watermelon-patterned leaves, this plant adds a playful touch to your greenery collection.


Bright kitchen corner featuring a potted green plant on the countertop next to watermelon slices and white tile backsplash.


 It loves humidity and performs well in bright, indirect light. Use a well-draining potting mix and water when the soil feels dry to keep this beauty thriving.


Philodendron Micans


The velvety, heart-shaped leaves of this philodendron boast a luxurious texture and rich green hue. It’s an easy-care plant perfect for small spaces.


Modern kitchen showcasing a lush hanging plant and smaller potted greenery on open wooden shelves above white tiles.


 While it tolerates low light, it thrives in medium to bright, indirect light. Mist the leaves regularly to maintain their velvety appearance and encourage healthy growth.


String of Turtles (Peperomia prostrata)


This compact trailing plant features tiny leaves with a striking turtle-shell pattern. It’s perfect for small apartments or windowsills. Preferring bright, indirect light, it thrives with consistent moisture. Ensure your pot has good drainage to avoid waterlogging.


"Minimalist home office setup with a wooden desk, laptop, golden lamp, and various potted plants, including a Monstera.

Why Choose Rare Trailing Plants for Apartments?


Balcony with potted plants on the floor and a boho-style rattan chair with string lights in the background.


Rare trailing plants are more than just decorative elements; they bring personality and sophistication to your living space. Unlike common houseplants, rare varieties often have distinct characteristics that spark curiosity and admiration. Their trailing nature also adds dimension to your home, creating a dynamic visual flow. Whether you hang them in baskets, place them on shelves, or let them cascade from pots, these plants elevate your apartment’s aesthetic while keeping the footprint minimal.


Best Containers and Hanging Solutions for Trailing Plants


Choosing the right containers and hanging solutions is essential for displaying trailing plants effectively.


Urban balcony featuring terracotta pots with green plants and a decorative chair with a patterned cushion.

 Stylish pots with sleek finishes complement the plant’s natural beauty. Ceramic or terracotta pots are great options and should have drainage holes to prevent root rot. For a boho-chic vibe, macramé hangers are ideal for saving space and adding a decorative element. Floating shelves and wall-mounted planters are other excellent solutions to showcase trailing plants while maximizing space in small apartments.


Tips for Maintaining Healthy Trailing Plants in Apartments


To keep your trailing plants thriving, pay attention to their specific care requirements. Lighting is crucial—most trailing plants prefer bright, indirect light, and grow lights can be helpful if natural light is limited. Avoid overwatering by checking the topsoil before watering and ensure proper drainage to prevent root rot.


"Living room corner with a plush armchair, neutral decor, and a large potted plant next to sunlight-filled windows.

 Boost humidity levels with a humidifier or a tray of water, especially for tropical varieties. Pruning helps maintain a tidy appearance and encourages healthy growth, while regular inspections for pests like spider mites and mealybugs can prevent infestations.


How to Propagate Trailing Plants


Propagation is an exciting way to expand your plant collection or share cuttings with friends. Start by choosing a healthy vine and selecting a stem with at least 2-3 nodes where leaves grow. Using clean scissors, make a sharp cut just below a node. For water propagation, submerge the node in a jar of water, ensuring it stays upright. For soil propagation, plant the node directly into moist potting soil. Keep the cutting in bright, indirect light and maintain consistent moisture. Within a few weeks, roots should develop, signaling a successful propagation.

Trailing Plants That Are Pet-Friendly

If you share your apartment with pets, it’s essential to choose plants that are non-toxic. The Spider Plant (Chlorophytum comosum) is a classic choice with arching, striped leaves that are safe for cats and dogs. Baby Tears (Soleirolia soleirolii) is another delicate trailing plant with tiny leaves that add a soft touch to any room. Burro’s Tail (Sedum morganianum) is a succulent with soft, trailing stems that’s also pet-friendly. However, always place plants out of reach of curious pets to prevent accidental damage or ingestion.


Conclusion

Incorporating rare trailing plants into your apartment not only enhances its aesthetic appeal but also fosters a sense of tranquility and connection to nature. From the whimsical String of Pearls to the luxurious Philodendron Micans, there’s a trailing plant to suit every taste and style. Which of these plants will you be adding to your collection? Share your thoughts and favorites in the comments below!


Explore more posts on apartment-friendly plants and subscribe to our newsletter for exclusive tips on indoor gardening. Happy planting! check our youtube channel for more informations and tips click here.


How to Choose and Care for Plants in Low-Light Apartments

If you live in an apartment with limited natural light, you might think that keeping plants is a challenge. However, with the right choice of indoor plants, you can transform your space into a lush, vibrant haven, even without much sunlight. In this guide, we will explore low light plants for apartments, the best low maintenance plants, and provide expert tips on how to care for them. Whether you're a beginner or a seasoned plant lover, this post will help you choose the right greenery for your low-light apartment.


Three potted green indoor plants, perfect for low-light apartments, placed near a sunny window with a cozy brown couch in the background.

A. What Makes a Plant Ideal for Low Light Apartments?

Before diving into the list of plants, let's first understand what makes a plant suitable for low light environments. Low light doesn't mean no light; it refers to spaces that receive little direct sunlight—like rooms facing away from the sun or corners with minimal windows.

Key Features of Low Light Plants

Adaptability: Low light plants have evolved to thrive in shaded environments, such as dense forests or under the canopy of larger trees.


Low Light Tolerance: These plants can survive in conditions where light is diffused or indirect.

Slow Growth: Many low light plants grow slowly because they are adapted to lower light levels.


When choosing plants for apartments with low light, it's essential to consider these factors so you can pick the best plants for your living space.


B. Top 10 Best Low Light Plants for Apartments


Now that you understand what makes a plant suitable for low light, let's dive into the top 10 best low light plants for apartments. These plants are ideal for homes with little sunlight and are perfect for beginners and seasoned gardeners alike.

1. Snake Plant (Sansevieria)

Why It's Perfect:

The snake plant is one of the easiest plants to care for and thrives in low light. Known for its upright, sword-like leaves, it adds a touch of modern elegance to any room.

 Care Tips:


Water sparingly, as snake plants are drought-tolerant.

Tolerates low light but can also adapt to bright indirect light.

Ideal for beginners due to its hardiness.


Hanging glass terrariums with air plants and pebbles, ideal for low-light apartment decor.


2. ZZ Plant (Zamioculcas zamiifolia)

Why It's Perfect:

The ZZ plant is a superstar when it comes to low-light environments. It has shiny, dark green leaves and can go for weeks without water. It’s the perfect plant for anyone looking for a low-maintenance plant for a low light apartment.

Care Tips:

Thrives in low to moderate light conditions.

Water when the soil is dry.

Resistant to pests and diseases.

3. Pothos (Epipremnum aureum)


Why It's Perfect:

Pothos is a classic low-light houseplant that grows quickly and is perfect for small apartments. Its heart-shaped leaves cascade beautifully, making it an excellent choice for hanging baskets or shelves.

Care Tips:

Adaptable to a variety of light conditions, but thrives in low light.

Water when the soil is dry to the touch.

Needs occasional pruning to maintain its shape.

4. Peace Lily (Spathiphyllum)


Why It's Perfect:

The peace lily is one of the most popular air-purifying plants that thrive in low-light conditions. It’s known for its stunning white flowers that bloom even in dark corners.

Care Tips:

Prefers medium to low light but can adapt to very low light.

Water regularly, but allow the soil to dry out between waterings.

Fertilize occasionally to keep it healthy and blooming.

5. Spider Plant (Chlorophytum comosum)

Why It's Perfect:

The spider plant is another excellent choice for apartments with low light. It produces small white flowers and “babies” (small plantlets) that can be propagated easily.

Care Tips:

Thrives in indirect or low light.

Keep the soil slightly moist but avoid overwatering.

Regularly trim dead leaves to encourage new growth.


Peace lilies and small green indoor plants in white pots, a great choice for low-light apartment spaces


C. How to Care for Low Light Plants in Apartments


Caring for low light plants doesn't have to be complicated. Even though these plants are adapted to darker environments, they still need some attention to keep them healthy. Below are some essential tips for plant care:

1. Watering Schedule


Watering is one of the most critical factors when caring for low light plants. Since these plants aren’t exposed to direct sunlight, they need less water. Overwatering can lead to root rot, so ensure you allow the soil to dry out between waterings.

2. Choosing the Right Spot

Even low light plants need some light to survive. Be sure to place them in areas that receive indirect light, such as near a north or east-facing window, or in corners where light is filtered through curtains.

3. Temperature and Humidity

Most low light plants prefer warmer, humid conditions. Avoid placing them near air conditioners, heaters, or drafts. Regular misting or placing the plant on a humidity tray can help keep the air around them moist.


D. Air-Purifying Low Light Plants for Apartments

One of the added benefits of growing plants in your apartment is their ability to purify the air. Many low light plants are known for their air-purifying properties, improving the overall air quality in your living space. Here are a few plants that help cleanse the air:

1. Snake Plant (Sansevieria)

Snake plants absorb carbon dioxide and release oxygen, making them ideal for improving air quality, especially at night.

2. Peace Lily (Spathiphyllum)

Peace lilies are effective in removing formaldehyde, benzene, and other toxins from the air.

3. ZZ Plant (Zamioculcas zamiifolia)

The ZZ plant is also known for purifying the air, helping to reduce the presence of pollutants in your apartment.

E. Low Light Plants for Small Apartments


If you have a small apartment, you might be concerned about limited space for plants. Fortunately, there are several low light plants that can thrive in small spaces while still making your apartment look more inviting. Here are some great options:

1. Air Plants (Tillandsia)

Air plants don’t need soil and can thrive in any space, including small apartments. Place them in decorative holders or hang them from the ceiling to save space.

2. Pothos (Epipremnum aureum)

Pothos can easily be grown in small spaces and can be placed on a high shelf or in a hanging basket. Its trailing vines add a touch of greenery without taking up too much room.

3. Succulents

While not all succulents are suited to low light, many varieties such as the Haworthia or Echeveria can tolerate lower light levels and are perfect for windowsills, small shelves, or even office desks.


F. Benefits of Having Low Light Plants in Your Apartment


Having low light plants for apartments does more than just improve the look of your home. Here are some key benefits that make them a must-have:

1. Air Purification

As mentioned earlier, many low light plants like snake plants and peace lilies help purify the air by absorbing toxins such as formaldehyde and benzene. This can lead to improved air quality and a healthier indoor environment.

2. Increased Humidity

Plants naturally release moisture into the air through a process called transpiration. This helps increase humidity in dry indoor spaces, which can be beneficial for both your plants and your skin.

3. Mental Health Benefits

Numerous studies have shown that indoor plants can reduce stress, improve mood, and even enhance concentration. The simple act of tending to plants can provide a sense of calm and well-being.


G. Common Mistakes to Avoid When Caring for Low Light Plants

While low light plants are generally easy to care for, there are some common mistakes that many apartment dwellers make. Here are a few tips to avoid them:

1. Overwatering

One of the biggest mistakes people make is overwatering their low light plants. These plants need less water than those that thrive in direct sunlight. Always check the soil before watering and allow it to dry out before you water again.

2. Using the Wrong Type of Soil

Low light plants typically need well-draining soil. Avoid using heavy, water-retaining soil mixes, as they can cause root rot.

3. Placing Plants in Complete Darkness

Although these plants can tolerate low light, placing them in a completely dark room can cause them to wilt and die. Ensure they still get some light, even if it’s indirect.

H. Best Containers for Low Light Plants in Apartments


Choosing the right container is essential for the health of your low light plants. Here are some container types that work best:

1. Drainage Pots

Always use pots with drainage holes to prevent water from pooling at the bottom and causing root rot.

2. Decorative Containers

For aesthetic purposes, you can use decorative containers such as ceramic pots, hanging baskets, or woven planters to enhance the look of your indoor space.

3. Self-Watering Pots

If you're concerned about over

Conclusion: Transform Your Low Light Apartment with Beautiful Greenery

Incorporating low light plants into your apartment can be a game-changer for both the aesthetics and health of your home. Whether you're looking to add a touch of greenery to a dark corner or transform an entire room, the best plants for low light are perfect for spaces with minimal sunlight. From the hardy snake plant to the air-purifying peace lily, these plants not only thrive in low light but also offer significant benefits like improving air quality and boosting your mood.

By selecting the right plants and following simple care tips, you can enjoy a flourishing indoor garden without worrying about a lack of sunlight. Plus, low light plants are often low-maintenance, making them ideal for apartment dwellers or beginners.

Start Your Green Journey Today

Now that you're equipped with knowledge about the best low light apartment plants, why not bring some greenery into your home? Start with one or two plants, find their perfect spot, and watch your space come to life.

Have a favorite low light plant or a care tip you'd like to share? Drop a comment below! We’d love to hear your thoughts or answer any questions you might have. Don’t forget to subscribe to our blog for more plant care tips, recommendations, and inspiration.


 Are Spider Plants Poisonous to Cats? The Truth You Need to Know

As a cat owner, it’s only natural to be concerned about the safety of the plants you bring into your home. You may have heard that certain plants can be harmful to pets, and now you’re wondering, "Are spider plants poisonous to cats?" If you're considering adding a spider plant to your home, this is an important question to answer. In this post, we’ll explore whether spider plants are toxic to cats, what to do if your cat eats one, and how to keep your feline friends safe while enjoying your plants. Let's dive in!


Spider plant and cat in a peaceful home living room

What Are Spider Plants?


Want to learn how to winterize your spider plants and keep them healthy during the colder months? Check out my YouTube video where I share essential tips for caring for your spider plants in winter!

Spider plants, scientifically known as Chlorophytum comosum, are one of the most popular and easy-to-care-for houseplants. They are native to South Africa and have become a common choice for indoor gardening due to their attractive appearance and air-purifying qualities. With their long, arching green leaves and small white flowers, spider plants can bring a touch of nature into any room.


In addition to being visually appealing, spider plants are known for their ability to improve air quality by removing toxins like formaldehyde and xylene from the environment. This makes them an excellent choice for households that want to add greenery while also promoting a cleaner living space. But while these plants have numerous benefits for humans, you might be wondering if they're safe for your pets, especially your curious cat.


Are Spider Plants Poisonous to Cats?


The short answer is no—spider plants are not considered poisonous to cats. According to the ASPCA (American Society for the Prevention of Cruelty to Animals), spider plants are non-toxic to both cats and dogs. This means that if your cat chews on or swallows part of the plant, it won't be poisoned in the same way that some other household plants can be harmful.

However, while spider plants are not toxic, they can still cause some mild health issues for your cat. This is due to the plant’s content of certain compounds, such as alkaloids, which can lead to gastrointestinal discomfort when ingested in large amounts. It’s essential to understand that although these compounds are not toxic, they may cause a mild upset stomach in your cat.


Curious cat near a spider plant in a living room


What Happens if a Cat Eats a Spider Plant?


If your cat decides to nibble on your spider plant, don’t panic—it’s not a cause for immediate concern. While it may be alarming to see your cat chewing on a plant, the consequences are typically mild. Spider plants contain compounds called tropane alkaloids, which can cause temporary gastrointestinal issues in cats, such as:

1-Vomiting


2-Diarrhea


3-Drooling


4-Mild lethargy

These symptoms may occur because the compounds in the plant can irritate your cat’s stomach. It’s important to note that these reactions are usually not life-threatening, and most cats will recover quickly once the plant material has passed through their system.

If your cat shows any of these symptoms after eating a spider plant, you can monitor them at home. However, if the symptoms persist for more than 24 hours or if your cat seems unusually lethargic or distressed, it’s always best to consult with your veterinarian to ensure your cat is safe.


spider plants effect on cats if they eat them


Symptoms of Poisoning or Irritation in Cats


Although spider plants are not classified as poisonous, it's still important to be aware of the symptoms of plant-related irritation in cats. If your cat consumes a significant amount of a spider plant, you may notice one or more of the following signs:

Vomiting: This is the body’s natural response to rid itself of something it’s found irritating or difficult to digest.

Diarrhea: A mild upset stomach can lead to loose stools or diarrhea, which may occur if your cat has eaten too much of the plant.

Excessive Drooling: Cats that chew on plants may start salivating more than usual.

Lethargy: While not common, some cats may become more tired or sluggish after ingesting parts of the plant.


If your cat displays any of these symptoms, it's a good idea to keep an eye on them and provide access to fresh water. Usually, the symptoms will resolve within a day or two, but if they don’t improve or worsen, contacting your veterinarian is always the safest option.

How to Keep Cats Safe Around Spider Plants


If you’re a cat owner and you have spider plants in your home, there are a few steps you can take to ensure your cat stays safe while still enjoying the beauty of your plants. Here are some tips:

1. Place Plants Out of Reach

While spider plants are not toxic, they can still cause stomach upset if your cat consumes too much. To prevent this, try placing the plant in a location that’s out of your cat’s reach. Hanging baskets or high shelves are great options to keep your spider plant safe from curious paws.

2. Use Deterrents

Cats are often drawn to plants because of their texture and the movement of the leaves. If you want to keep your cat away from a spider plant, you can use natural deterrents. For instance, citrus peels (such as lemon or orange) are known to deter cats due to their strong scent. Spraying the plant with a pet-safe repellent spray can also help keep your cat at bay.

3. Offer Cat Grass or Catnip

One of the reasons cats chew on plants is to satisfy a natural craving for certain grasses. Consider offering your cat cat grass, which is non-toxic and safe for them to eat. You can also grow some catnip if your feline friend enjoys it. Providing these alternatives can reduce your cat's temptation to nibble on your spider plants.

4. Training Your Cat

Training your cat to stay away from plants can take some time and patience, but it’s possible. When your cat approaches the plant, gently redirect them to a different activity or place. Positive reinforcement, such as giving your cat a treat when they leave the plant alone, can also be effective in teaching them good habits.


Curious cat near a spider plant in a living room


Are There Any Benefits of Spider Plants for Cats?


While spider plants are not harmful to cats, you might be wondering if they offer any benefits for your feline friend. While spider plants themselves aren’t typically considered to have direct health benefits for cats, they can indirectly contribute to a healthier home environment.

Air Purification

Spider plants are excellent air purifiers. They absorb harmful chemicals like formaldehyde and xylene from the air, which can help improve the overall air quality in your home. This can create a better living environment for both you and your cat, especially if you live in a space where air quality is a concern.

Natural Aesthetic

Spider plants add natural beauty and greenery to your living space. Studies have shown that incorporating plants into your home can reduce stress and anxiety, which can benefit both humans and pets. Additionally, having plants around can provide mental stimulation for your cat, as they may enjoy the movement of the leaves or even play with the baby plantlets that dangle from the plant.


Alternatives to Spider Plants: Cat-Friendly Plants for Your Home


If you’re still concerned about your cat's safety around spider plants, there are plenty of other cat-friendly plants that you can safely include in your home. Here are some great alternatives that are non-toxic to cats:

Boston Fern (Nephrolepis exaltata): This lush, feathery fern is safe for cats and adds a pop of greenery to your home.


Areca Palm (Dypsis lutescens): Known for its graceful fronds, this palm is non-toxic to both cats and dogs.


Cat Grass (Dactylis glomerata): Grown specifically for cats, this grass is safe for your pet to nibble on and is a great alternative to spider plants.


Calathea (Calathea spp.): Another non-toxic plant that is safe for cats and offers beautiful foliage.


If you’re unsure whether a plant is safe for your cat, always check with the ASPCA’s list of toxic and non-toxic plants or consult your veterinarian.


Conclusion

Spider plants are not poisonous to cats, so you don’t need to worry about your feline friend coming into contact with one. While they may cause mild gastrointestinal upset if consumed in large quantities, these plants are generally safe for pets. By keeping your spider plant out of reach, offering alternative cat-safe plants, and monitoring your cat’s behavior, you can enjoy the beauty of your spider plant without putting your pet’s health at risk.

Remember, if your cat shows any signs of illness after ingesting part of a spider plant, contact your veterinarian for advice. With a little care and precaution, you can create a pet-friendly home that both you and your cat will love!


Spider Plant Winter Care:

 The Ultimate Guide to Keep

 Your Plants Thriving 

During Cold Months


After two decades of growing houseplants and answering countless questions from fellow plant enthusiasts, I've noticed that winter care consistently puzzles many spider plant owners. These resilient beauties might be low-maintenance, but they still need some special attention when temperatures drop. Let me share what I've learned about keeping spider plants healthy during the coldest months of the year.


Woman in cream sweater smiling while caring for healthy spider plant near bright window during winter


Understanding Your Spider Plant's Winter Needs

I remember my first winter with spider plants – I treated them exactly the same as during summer and quickly learned that was a mistake. Spider plants (Chlorophytum comosum) naturally slow their growth during winter months, and their care needs change accordingly. Through years of observation and some trial and error in my own indoor garden, I've developed a reliable winter care routine that keeps these plants thriving.

Temperature: The Critical Factor

The biggest challenge I've encountered with winter spider plant care is maintaining the right temperature. Through my experience, I've found that spider plants prefer temperatures between 60-75°F (15-24°C). During one particularly cold winter, I made the mistake of leaving a plant too close to a drafty window – the brown tips appeared within days.


Here's what I've learned works best:

-Keep plants away from cold windows and drafty areas

-Maintain at least 6 inches distance from heating vents

-Avoid placing them near frequently opening exterior doors

-Consider moving plants slightly inward from windows during extreme cold snaps

Winter Watering: Less is More

The most common winter care mistake I see – and one I made myself years ago – is overwatering. During winter, spider plants need significantly less water than in their active growing season. I've developed a simple watering routine that hasn't failed me yet.
My Winter Watering Schedule:

-Check soil moisture weekly, but only water when the top 1-2 inches feel dry

-Reduce watering frequency by about half compared to summer months

-Use room temperature water to avoid shocking the roots

-Empty drainage trays promptly to prevent cold, wet roots


Plant enthusiast in green sweater propagating spider plant in kitchen with natural winter lighting


The Humidity Factor

Here's something many guides don't mention – winter heating systems can wreak havoc on spider plants by reducing humidity. After losing several leaf tips to dry air, I've found several effective solutions:

-Group plants together to create a microclimate

-Use pebble trays filled with water beneath plants

-Run a humidifier nearby during the driest months

-Mist leaves occasionally, but only in the morning so they can dry before night

Light Requirements During Shorter Days

Through years of experimentation, I've discovered that spider plants can actually tolerate lower light conditions during winter, but they still need bright, indirect light to maintain their vibrant appearance. In my home, I've had the best success with:

-East or west-facing windows during winter

-Slightly increased distance from south-facing windows to prevent leaf burn

-Using sheer curtains to filter intense winter sun

-Rotating plants weekly to ensure even growth


Woman examining spider plant health under warm evening lighting during winter months


Feeding and Fertilization

One of the biggest lessons I've learned is that spider plants need a winter rest period. I made the mistake of year-round fertilizing when I first started growing them, which resulted in weak, leggy growth. Now I follow this schedule:

-Stop fertilizing completely from late fall through winter
-Resume feeding in early spring when new growth appears
-Use a balanced, water-soluble fertilizer at half strength when restarting
-Watch for new growth as your signal to resume normal feeding

Common Winter Issues and Solutions

After helping countless readers with their winter spider plant problems, I've noticed some recurring issues. Here's what I've learned about preventing and solving them:
Brown Leaf Tips:

-Usually caused by dry air or fluoride in tap water
-Switch to filtered water or leave tap water out overnight
-Increase humidity
-Trim brown tips at an angle to maintain leaf shape

Yellow Leaves:

-Often indicates overwatering in winter
-Check roots for signs of rot
-Adjust watering schedule
-Ensure proper drainage


Spider plant care expert in plant-themed sweater arranging plant in copper vase on marble counter


Pest Management:

Over the years, I've found that winter-stressed plants are more susceptible to pests. My prevention strategy includes:

-Regular inspection of leaf undersides and crown
-Maintaining good air circulation
-Cleaning leaves monthly with a damp cloth
-Treating any issues immediately with insecticidal soap

Special Winter Considerations

Through my years of growing spider plants, I've discovered some lesser-known winter care tips that make a significant difference:
Growth Changes:

-Expect slower growth and fewer babies (plantlets)
-Don't panic if your plant seems dormant
-Focus on maintenance rather than growth
-Wait until spring for propagation

Location Adjustments:

-Consider moving hanging plants lower to benefit from rising heat
-Keep plants away from cold windowsills at night
-Protect from both hot and cold drafts
-Monitor for signs of stress after moving

Preparing for Spring

As winter winds down, I start preparing my spider plants for their active growing season. Here's my transition routine:

-Gradually increase watering as days lengthen
-Clean all leaves thoroughly to remove winter dust
-Check for crowded roots and prepare for potential repotting
-Slowly reintroduce fertilizer as new growth appears

Final Thoughts

After two decades of growing spider plants, I can confidently say that winter care doesn't have to be complicated. The key is understanding that these plants need a rest period and adjusting your care routine accordingly. Pay attention to your plant's signals, maintain consistent care, and remember that less is often more during the winter months.


Experienced plant owner cheerfully maintaining spider plant by sunny winter window


Remember, every home creates a unique environment, and what works in one space might need adjustment in another. Don't be afraid to fine-tune these recommendations based on your specific conditions. With proper winter care, your spider plants will emerge strong and ready for vigorous spring growth.
If you're new to spider plant care or struggling with winter issues, start with these basics and adjust as needed. Your plants will tell you what they need – you just need to learn their language. Happy growing!


NewerStories OlderStories Home